In this installation of my rambling… how did I physically install the radios.
This one is not entirely groundbreaking. Both pros and well disciplined amateurs have been using modular or sacrificial board, plates, trays, etc., to install equipment and wiring. Such objects can then be moved between vehicles (like from a wrecked cruiser to a new one, in the professional world), or removed upon trade-in, with minimal effort, aside from pulling a few cables.
I used this concept very successfully in my 2010 F-150, since there was ample room behind the seat. I mounted a tray vertically behind the back seat (against the back wall of the cab) – before installing any equipment, I took this bracket into my workshop, and spent HOURS laying out equipment, routing cables, and drilling holes for cable clips to be installed and mounting brackets.
The down side to this operation was that moving equipment around, maybe for adding new gear, was a pretty substantial operation, as moving any cables would require new holes for all of the cable clips that had to be moved.
That being said – I had three XTL series radios, two VRS750s, a GPS, fuse block, and some other ancillary equipment all installed on this panel. While I didn’t have much room to spare, I will say that when I needed to work on the plate, or when I sold the truck, pulling 2 bolts that secured the plate in the truck and disconnecting a few cables was FAR easier than unbolting individual pieces of equipment. Additionally, cable management was easy to keep CONSISTENT within the equipment, since the cables came out with the plate.
Nowadays, I have a lot less equipment in the vehicle. I have two XTS5000 XTVAs, and a CS800D DMR radio. The XTVAs were a “because I have them” item… and I have a UHF pyramid SVR200, but I don’t see the need for it at this immediate moment. ONE of the XTVAs will have a remote head and speaker installed eventually, if I want to play with P25, but my primary operation is DMR and FM at the moment…. and I’m rambling again.
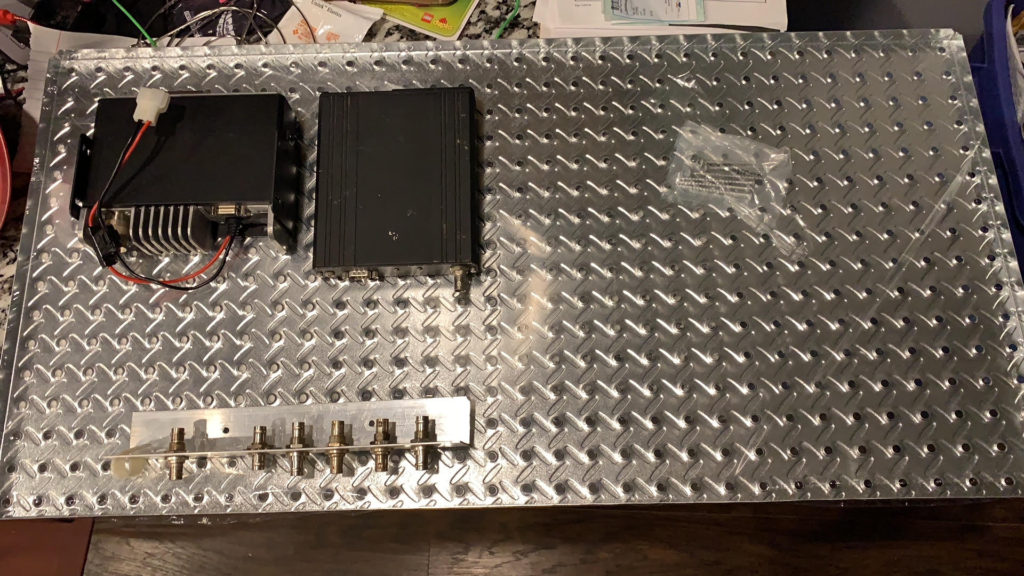
This time, I wanted to see what I could do to allow for future flexibility, should I want to change things up, without spending 4 hours drilling holes and snapping off drill bits. I thought back to my electromagnetics practical labs in college when we were experimenting with lasers. They used to use high-precision machined plates with a grid of holes drilled in them. this meant they could finish one experiment, and easily set things up for a new configuration without needing to have new plates built. Seemed like a good concept. I thought this was a good design basis, but I wasn’t about to try and drill a grid of holes like that, so the search for a pre-drilled plate began. somehow, I stumbled on the idea of metal pegboard…. lo and behold, such a thing existed! I found several varieties at uline and the various big box stores websites. I wanted something I could lay my hands on to try out before I bought it, so I ended up with a $20 diamond tread plate form Lowes.

As you can see, there IS room for growth. I use a BNC bulkhead panel for quick antenna disconnect / reconfiguration, which is a lesson learned once upon a time. I needed to swap antennas, or use an external antenna. The BNC panel makes this all easy, as long as I have a couple type N, Mini-UHF, and UHF to BNC adaptors tucked away, should I need them.
The nice thing is that the holes are all the same size, and on a regular grid, so I can plan things out and reconfigure easily.
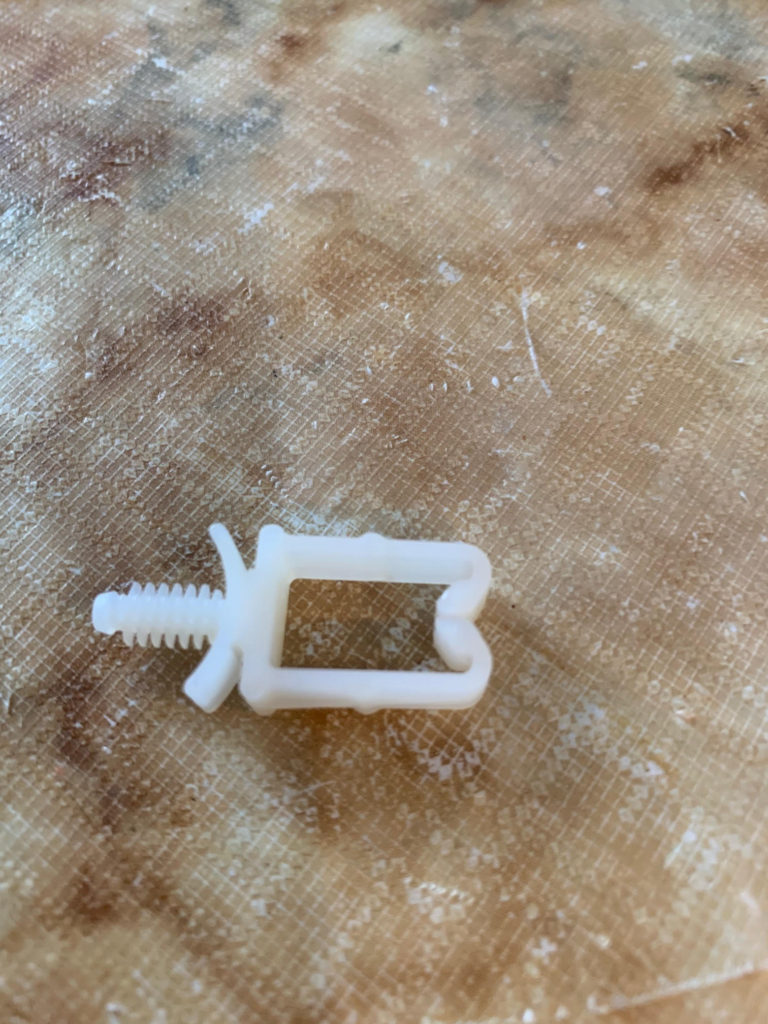
The next problem (besides general equipment layout) was how I planned to fix cables in place. I didn’t want to have to take out every screw in the panel if I moved a single wire within a bundle…. so I started looking for wire clips intended to fit into a single hole. I did find some on Ebay that were supposed to fit the holes in the pegboard I had…. and it turned out the studs were smaller than the holes, so they were not a direct fit. All was not lost, however…. I did some experimenting and found that they locked into a #8 washer (I used 8-32 screws and nuts for a majority of the physical install) quite well. So I used these clips with #8 washers as backers for wire installation

the one downside to these is that they won’t clip around the commonly available 1/2″ split loom, and the loom won’t clip around them. If I were to do it all over again, i MIGHT look for some round clips intended to clip over 1/2″ split loom, just so I could dress the wires a little nicer. I still plan to put some loom over them, but I need to find a smaller size as of now.
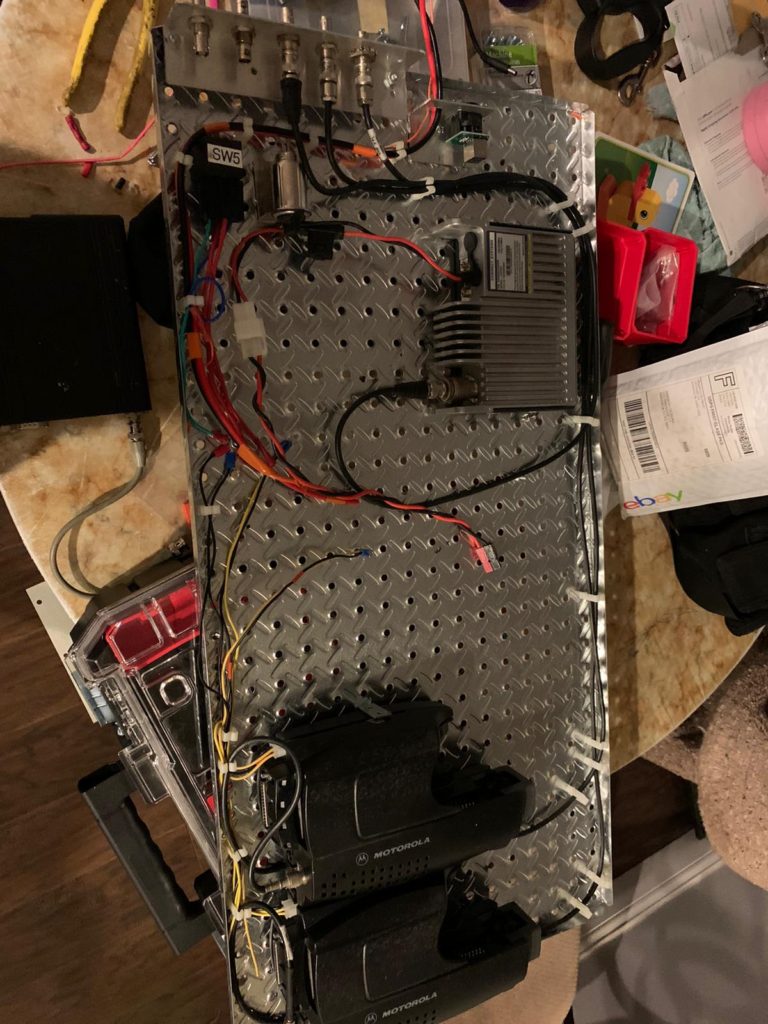
Here’s an in-progress of routing cables, and locating equipment. Note that the breaker panel is also missing at this point.

I did custom make each of my radio harnesses, so that they were the correct length, and was lucky enough that he XTVA power connectors were the right length for what I needed.
Side note: XTVAs use a 4 pin molex connector which is the SAME as a computer ATX motherboard power connector. the one gotchya is that the black wires are power and return, so those need to be identified and properly marked. The audio connector on the XTVAs is a 6 pin computer accessory power connector (used for video cards, I believe). Details on the XTVA connector pinouts are here: http://batlabs.com/xtva.html
And here’s the final radio installation detail, noting that the breakers are on a bracket, but not in their final mounting configuration:

as you can see – the clips make a big difference on cable routing, and they DO help. Once I loom the cables, I may separate RF, Power, and interconnect a bit more, but for now, this is the best I have the capacity for. It is still quite manageable, and easy to pass individual wires where I want them.
All in all, the pegboard isn’t PERFECT, but it does fit my needs quite well. I’ve installed a couple L brackets on the bottom, one of which lines up perfectly with a bolt in the floor of the truck. The breakers are mounted such that I can flip up the back seat to see them (they’re on a 45 degree angle facing forward and down). I did fabricate a plastic shroud over the positive wiring terminals, to keep any metallic FOD (Foreign Object Debris) from causing issues, though this is a very low likelihood, given the location of the panel (behind the back seat).
